Saturday, November 30, 2013

Dreamtime Designs Craft Challenge -- My Techniques

I'm so excited to tell you all about the brand new challenge at
Not only because the theme this month is outstanding but also because I'm thrilled with the results of my own project.  Add in the fact that we have a FANTASTIC sponsor this month and you've got a complete package!

The winner chosen by the Design Team will receive
a one year subscription to
Through the Craft Room Door!!!
 TTCRD is an online paper craft magazine which can be downloaded to your personal computer and is filled with tutorials, inspirations and articles for the subscribers to read.  Your subscription also allows you access to over 80 free digital images to create cards, scrapbook layouts and other projects.

Would you love to be published and have a chance to win a $25.00 gift certificate to the store of your choice?
You can do this by submitting a paper craft creation to the magazine - details for submissions are located on the web site which you can join for free.
Pretty great, right?

Now on to this month's theme:
My Techniques - Christmas:
A Technique I've Never Tried Before
This challenge revolves around the theme of Christmas & expanding your skills with a brand new technique you have never done before but have always wanted to give a go.

There are 2 questions that need to be included and answered in your post about your project.  They are:
1) Why did you want to try this technique?
2) What has been your experience with it?
>>You can see my answers a bit further down in the post.<<

Here's a little sneak peek of the new technique I tried:
Okay, so it's not really much of a peek of the actual technique.
If I showed too much the cat would be entirely out of the bag.

My choice for this challenge was completely inspired by my lovely Design Team sister, Cindy.  She and her Mom, Corrie, have started a new challenge blog all about embroidery on cards....What?  Hand embroidery on cards?!  It is some of the most beautiful stuff I have ever seen!  From what I understand it's very popular in the Netherlands (where Cindy and Corrie live.)   You can take a look at their challenges here.  The artistry displayed on the cards is phenomenal!!

Since I had never embroidered anything in my life I was a bit apprehensive at trying it.  Then I figured: what the heck.  It's only a bit of cardstock and thread.  If it fails I'll just try, try again.  My first attempt is what you see here!

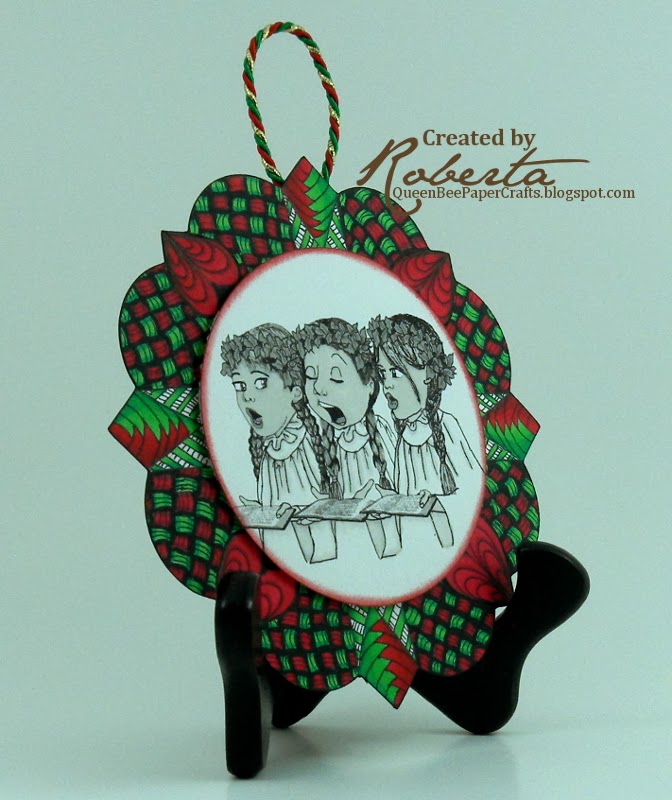
This adorable image is Eleanor Santa's Helper
from
Lacy Sunshine.
I love everything Heather does at Lacy Sunshine
but Eleanor is my favorite!
She was cropped quite a bit so I could really
spotlight that incredible face of hers.

I have to admit that the embroidery did take me hours to do.
Keep in mind that I'm not a sewer.
~~I truly believe safety pins were invented so I wouldn't have to sew.~~
As I slowly stitched away, I watched a "Leverage" marathon on Netflix.
It was a cold, gray and rainy day so the time was well spent in my opinion.

These are the 2 supply items I used for the embroidery
in addition to the pattern.  You can see the thread is variegated.
That's what gave the great color changes in my swirls without
having to switch threads.
The only really small needle I had was in a sewing kit I carry
in my purse...for the safety pin only, of course.
It was from a hotel room several years ago.
Being a pack-rat pays off sometimes.

The pattern that I found on Etsy looks so intricate but is really quite simple.  It's just a series of short stitches going along several swirls.  You can find this and loads of other patterns at Darsie's Etsy shop here.

I just had to make this one into an easel card.
Hopefully the recipient will feel it's worthy of display.

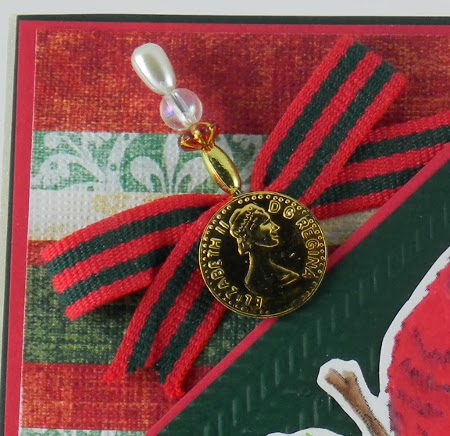
Eleanor was colored using my ProMarkers.
While I was attaching her to the embroidered cardstock,
a glop of glue squeezed out next to the holly leaves.
To save my hours of stitching,
I paper pieced another leaf and berries over the glop.
~~Yes, glop is a very technical term.~~ 

Other items used in making this card were:
Cardstock:  Bazzill Basics
Pattern paper:  Mary Englebreit from the Michaels $ bin
Rhinestone stickers and chipboard frame:  My stash

I cannot thank Cindy and Corrie enough for
inspiring me to try this new technique!!
This is something that I will absolutely be doing again.
Perhaps not all at once next time.
Breaking it down to small increments will make it
much more manageable for me at least until
I get a bit faster.

Now back to those questions that I mentioned above:
1) Why did you want to try this technique?
I had never seen this until recently and became instantly enthralled with it.  Trying new techniques for both card making and other crafts is something that really excites me.  The fact that I'm not a sewer did frighten me a bit but the cards I've seen with embroidery on them are so gorgeous that I quickly overcame my apprehension.

2) What has been your experience with it?
I loved doing this more than I can say!  It did take quite a lot of time this first try.  Future projects should go much more quickly.  I have a feel for what is needed and can see how getting into a rhythm will happen easily.


Now, what technique have you wanted to try?
This is a perfect time to do it!
If you have any questions about the challenge,
please hop over to our Facebook page.
We'd love to meet you and offer any help you may need.

You can find this card in the following challenges:

Cindy and Corrie's Challenge -- Challenge #1
Lacy Sunshine -- Anything goes
Jellypark Friends -- Christmas
Pattie's Creations -- Christmas CARD
Stamp Sun Challenges -- Merry Christmas
Totally Paper Crafts -- Ho, ho, holidays
Crafty Little Fairies -- Classic Christmas: red, green & gold
Crafting by Designs -- Christmas/winter
I Love ProMarkers -- Anything goes

Thank you so much for letting me show off my new technique today!
I'm just a tad bit proud...if you couldn't tell.


Hiding in My Craft Room -- Freestyle

Happy Saturday and welcome to our new challenge at
Today begins a fun one....
Freestyle.
Let your imagination and creativity go crazy!
With so many holiday decorations, cards and gifts being made right now,
I expect to see a huge number of projects entered this time 'round.
It should be lots of fun!

The image that I've used for my project this week
is 
Christmas Holly Fairy
from one of my absolute favorite artists:
Mo Manning.
I think the sweet factor of this one is off the chart!!

Because little Holly Fairy is so stinkin' cute, I really wanted to make some sort of home decor item....for me.  One of my lifelong obsessions has been with beautiful bottles, jars, cloches, etc.  (I even collected bottles when I was little.  Forget Barbies.  I wanted the gorgeous glass items.  Weird?  Perhaps.)  Merging my love of this image and a cloche I found at Marshall's was a perfect solution for me.  I'm probably prouder to show this project than any other.  Here she is:

I am over the moon in love with this!

The lamp post and tree were both cut with my Cricut.  The tree is from Cricut Craftroom Basics.  It was stretched in Craftroom to make it taller and skinnier.  I cut it 4 times, folded them each down the center, added some white embossing powder, and then glued them all together at the center fold.  The lamp post is from Mini Monsters and was cut 3 times.  I glued them together to make it more sturdy.  It normally has a long bar on one side to hang small signs. I just snipped that off and then added a bit of embossing.  The "glass" of the lantern is from plastic packaging.  After I trimmed it down to size, I colored it with a dark yellow Bic Mark-it and sandwiched it between 2 layers of the lamp post before they were glued together.

All 3 elements of the little scene are attached to a circle of cardstock.  Small tabs were glued to the back of each item and then glued to the circle.  To cover the circle, I wanted to add some "snow."  I worked with what I had on hand....pillow stuffing.  Don't worry.  I didn't cut a good pillow apart.  This stuffing is from one that needed to be repaired anyway.  The small amount that I took didn't make much difference since the pillow was a little over stuffed.

Here's a closeup of the scene.
I think I may add another tree behind little Holly.
Or maybe not....I'm really lovin' it just as it is.

I used my Sakura Stardust Gel pen for some sparkle inside the snow globe and added  Glossy Accents to give the appearance of a glass globe; sadly, it just didn't want to show up in the photos.  In person it looks really cute.

You can find this project in the following challenges:

Bronte & Bella's -- Anything but a card
A Creative Romance -- Vintage style
Totally Paper Crafts -- Ho, ho, holidays
Wags 'n Whiskers -- Things with wings
An Inky Situation -- Trees
Crafty Little Fairies -- Classic Christmas: red, green & gold
Delightful Challenges -- Favorite things
ABC Christmas Challenges -- X for out of the boX...no squares
Crafting by Designs -- Christmas/winter
I Love ProMarkers -- Anything goes

Now it's your turn to go Freestyle!
All of us on the Design Team at 
Hiding in My Craft Room
are super excited to see all of your new creations.

Thanks for spending some time with me today.

Edited:
This project is also in a new challenge at
Bronte & Bella's for my favorite Mo Manning project of 2013.
It was almost impossible to decide which project to submit....
I fall in love with EVERYTHING I do with a Mo image.
Coincidence?  I think not!
She's one talented lady!!


Friday, November 29, 2013

Through the Craft Room Door and Lacy Sunshine

Hello and thanks for stopping by today!

I want to share a card that was published in the current issue of

All of the ingredients used to make this card can be found there.
Check out the preview video for this month's issue
in the upper right column of this page.

You'll love all of the great tutorials, ideas and inspiration you get in each issue of the magazine.  Plus your subscription allows you access to past issues and over 80 digis that have been featured.  It's a great value at just $18 (USD) a year...just the digis would cost so much more than that!

The image I used on this card is from
Lacy Sunshine.
She's called
Snowflake Quality Control.
Too sweet, right?


I have sent this card to a lovely lady in the Netherlands named Cèline.  We both participated in the Christmas card swap that was organized by the very sweet Manderly on the Lacy Sunshine FB page.  There are so many great people in this group....if you're a LS fan, you should go check it out!

You can find this card in the following challenges:

Addicted to Stamps & More -- Holidays
4 Crafty Chicks -- Christmas
Creative Knockouts -- Tic Tac Toe: flowers, pearls/bling, ribbon
Crafting by Designs -- Christmas or winter
I Love ProMarkers -- Anything goes
Scrapper's Delight -- Make it sparkle
Whoopsi Daisy Challenge -- Things with wings
Fantabulous Cricut Cuts -- Sparkle & bling (used Winter Lace cart)

Thanks again for stopping by and I hope you'll have a chance to see more details in the Holiday issue of

Wednesday, November 27, 2013

Stamp 'n Doodle -- Add some chipboard

Hello and welcome to an all new challenge for
Thanks so much to everyone that was able to join us last week!

Our theme this week is:
Add some chipboard.


The only chipboard I had was super girly and just didn't seem to work with the image I chose for this week.  (And, by the way, how cute is that little angel?)  I decided to improvise and make my own chipboard; so I just cut a soda box into a couple of pieces and embossed them.  Crisis averted....but that also meant I didn't need to go shopping.  Obviously I didn't think that one through very well.


I'm really pleased with the way the homemade chipboard came out.  After I embossed the pieces, I inked them a bit.  The diagonal striped piece was just swiped with white ink.  The sentiment was inked with red but it didn't show up as well as I wanted.  My Ruby ProMarker helped accent it.  It only needed to be touched lightly on the surface of the letters and the border.

You can find this card in the following challenges:


I hope you're able to join us at Stamp 'n Doodle for the new challenge.  Maybe you can even try your hand at making your own chipboard.
It's fun, easy and free.  

Thanks for stopping by today.
For all of my fellow Americans:
I would like to wish you a safe and joyous Thanksgiving!

Tuesday, November 26, 2013

Just Inspirational Challenges -- Rosettes

I'm really excited about the new challenge at
this week!
We have a great theme and a great sponsor.  
So this should be lots of fun for you!!

Our theme this week is:
Rosettes

And our generous sponsor is:
The Paper Shelter

This is the great image I chose to use for the challenge.
It's called "The turkey is ready" and you can find it along
with a pre-colored version and coordinating backgrounds
here.  All for one low price!
Don't we all look just like this after cooking a complete
turkey dinner?  Lol.

When I learned the theme of the challenge, I went straight to YouTube to find some tips on making rosettes a bit more efficiently.  I had made them in the past but it just seemed to take a really long time for me.  Turns out I just needed more practice; I was already doing them correctly.

While I was looking through the various videos, I came across a great video by LisaEDesign.  She's generously allowed me to link to that video here.  Lisa shows how to use the design of chevron papers to really change up your rosettes.

Her inspiration spurred me on to creating several different rosettes out of just 3 different papers.  Here are photos showing those differences...sometimes the changes are subtle but still make for interesting results.

These 2 rosettes were cut and folded at the same measurements.
However, the one on the left has the outside points folded down
while the right one has the outside points folded up.
The difference is definitely subtle on this paper pattern.

These 3 really start to show the differences of how
the cutting and scoring are done can make dramatic changes.
The rosette in the lower left was scored at every point
(upper & lower) for a much tighter result.
The one in the center was scored at just the lower points.
The final rosette was scored at the upper points.
Switching the points that are scored along with leaving
different color bands on the outside of the rosette gives
a completely different look.  I love those 2!

Because of the great color combo on this chevron paper,
I wound up with some very obvious differences in these rosettes.
All 3 in the left inset are close to the same size and are all scored at the upper and lower points.  Just the colors of the stripes changes the results in a really great way.
The 3 that are in the right inset, are the results of mistakes.
I tried to make a much larger rosette with the one on the lower left.  The strip I worked with was 12" long by about 3 3/4" wide.
If I had added another 4-6" to the length, it would have been fine.
Since I didn't, it split at one of the score lines when I was gluing it together.  Phooey.
The other 2 were scored at just the lower points and should have been at every point....again 'splitage' occurred.  Double phooey.
Instead of tossing them, I took my scissors and trimmed each score line to the same point of the tear.
Suddenly, I have dimensional snowflakes with a chevron pattern!
Love it when I can salvage something.

I decided to make a wreath with the rosettes I'd been playing with and that awesome image from The Paper Shelter.
The base for this rectangular wreath is chipboard wrapped in
burlap ribbon.  After deciding on the placement of the rosettes, the image and the sentiment banner, I used hot glue to adhere everything to the base.

The centers of the rosettes were all embellished
with buttons and brads from my stash.
You can see that one of the rosettes isn't in a chevron pattern.
I flipped the one on the top center over
to use the polka dot paper on the reverse side.
The pop of red just felt like it needed to be there.

You can find this wreath in the following challenges:


I would like to thank Lisa once again for the fantastic video!
(Click on her name here to go take a look at her fab blog too.)
Playing with the different patterns, scoring and folding was a lot of fun....I'm obviously easily entertained.
Hopefully you've found some inspiration to try your hand at rosettes too.  They're such an inexpensive way to add huge impact to projects.

Please hop over to Just Inspirational Challenges
and take a look at the other Design Team members' projects.
We all hope you'll be adding your own new rosette project
to our challenge this week.
Have fun and good luck!!

Thanks for the time you've spent here today.


Monday, November 25, 2013

Created With Love Challenges #68

Welcome to a brand new week....
and the start of our next challenge at

Our theme this week is
Sympathy/Missing you.
So you can decide which direction you would like to take your project.

This is the adorable image I chose
from this week's fabulous
sponsor.

Our sponsor is
**I didn't even realize I had chosen the logo image until I was typing up this post.....
my power of observation is usually much more acute than that!**

I opted to go with the Missing you theme for my card and keep it at an A2 size. This way it could be included in my November shipment to Operation Write Home.

I once again played with the spotlighting technique.
This time I colored the non-spotlighted portion in black & white.
It was really fun coloring it this way and I love the results!

You can see in this photo that I've kept the profile very low.
This is another big must for OWH cards.

These fun blue patterned papers are from Studio G.
I got them in the dollar bin at Michaels.
They are also available at WalMart and Meijer.
Great value and I highly recommend you picking some up
if you spot them!!

In addition to the Studio G paper, the other ingredients of this card are:
Coloring Medium:  ProMarkers
Cardstock:  Papertrey Ink
Button brad:  Recollections
Sentiment stamp:  Papertrey Ink

You can find this card in the following challenges:

Challenges 4 Everybody -- Anything goes #34
Color Me Creative -- Anything goes #82

Be sure to check out all of the other Design Team inspiration pieces at Created With Love.  You won't be disappointed!
All of us on the team look forward to seeing your new projects this week.  Good luck to all who enter!

Thanks so much for spending some time here today.
I hope you have a great day!


Saturday, November 23, 2013

Hiding in My Craft Room #125

Welcome to the weekend!
Every Saturday begins a brand new challenge at
This week we want to see your new projects using this theme:
Thanksgiving/Thankfulness.

Thursday, November 28, is Thanksgiving here in the US so this theme is very appropriate for me.  Then again, Thankfulness is a theme that we should all embrace year 'round.  I know that I have been abundantly blessed and I am truly grateful everyday.

I decided to make a subway style sign for our mantel for my project.
It looks very intricate and difficult but I have to say
it was really one of the easiest projects I've ever made!

The sign is 12x12.  It only looks so small because
it's sitting in an absurdly huge easel.

This great design comes directly from the Cricut Word Collage cartridge.  Thanks, Connie!  (I won this cart in her blog candy draw a couple of months ago.)  The Thanksgiving collage was cut at 10 3/4".  

All elements of the Cricut cuts were done using Copper Metallic Matte Vinyl from CricketVinylSupplies.com.  I just cannot say often enough how much I love their products!  The selection of colors they offer is fantastic.  Best of all though, this stuff cuts like a dream!!  I set my Expression on 3 for everything...Blade depth, Speed, and Pressure.  Using transfer tape is an absolute must for me.

The large swirl along the side is from Home Decor.  It is 2 Swirl #3's.
I flipped one and then welded them together.
It was then sized to the same height as the word collage.

The patterned paper is from DCWV The Natural stack.
It has a very subtle tone on tone pattern that I thought
looked great with the copper vinyl.

You can find this project in the following challenges:


Now it's your turn to make a project using our
Thanksgiving/Thankfulness theme.
All of us on the Design Team at
look forward to seeing what you share with us this week.

Thanks for the time you've spent here today.
And to all of my fellow Americans,
I would like to wish you a very Happy Thanksgiving!!


Wednesday, November 20, 2013

Stamp 'n Doodle -- Christmas Friends

I'm here today to invite you to join in the fun at
for our brand new challenge.
The theme for this week is:
Christmas Friends.

With all of the Christmas cards being made right now, I expect to see lots of great entries this week.  Hopefully you'll be able to include one of your new projects.

This is the hilarious Stamp 'n Doodle image I used this week.
Don't you just love the looks on all 3 of those faces?

My sweet and very talented friend Gemma recently mentioned her new fascination with Zentangling.  I had to do a quick Google search to see what she was talking about!  Imagine my surprise when I found out that what I've always done while on the phone not only has a name but is an actual art form.....much more refined than my mindless little doodles but the same concept.

I decided to play with Zentangling (also called Zendoodling) a bit and became hooked!  There are a huge number of fantastic tutorials on the different strokes available.  The site that I've found most helpful is Tangle Patterns.  You can find dozens of step by step drawings and how to put the various patterns together.

Most Zentangles are left black and white.  Occasionally a bit of shading is added.  The ones that were colored really captured my attention.  I knew I would be pulling out the ProMarkers to see what I could do.  Since I also wanted to complete my DT project for this week's SnD challenge, I decided to combine the 2.

Because the Zentangle background became so bright and busy,
I colored to the image in black and white to really play up
the contrast between the 2 components.


I added a loop of cording from my stash so this can be used as
an ornament or added onto a wreath.
Who knows where this will wind up?  I don't!

You can find this ornament in the following challenges:

Bearly-Mine Challenges -- Traditional Christmas colors
Make It Monday -- Anything goes #167
My Craft Creations -- Anything goes
Stamps & Fun = Creativity -- Digistamp

All of us at Stamp 'n Doodle look forward to seeing your new Christmas Friends projects....good luck to all who enter!

Thanks, as always, for stopping by today!
Leave a comment about your own Zentangling...
I bet lots of you have done it without even realizing.


Tuesday, November 19, 2013

TTCRD -- November 19 through 25

Welcome to Tuesday and a brand new challenge at
Through the Craft Room Door !
As always, the theme is
Anything Goes.

Sponsoring Team B's challenge this week is
Anne's Digital Art


I was happy to receive this incredible cardinal image
to use for this week's challenge.
Seeing a cardinal in the winter is one of the most
beautiful things I can imagine!

The stick pin is from various bits I found in my stash.
The coin added to the pin actually came from my Mom's stash.
Thanks, Mom!


I had seen someone do a greeting on a small scroll like this recently
and just fell in love with it.
Sorry I didn't make note of where I saw it....
I would love to give credit for the inspiration!


You can find this card in the following challenges:

Crafty Sentiments -- Christmas
Crafty Bloggers Network -- Christmas
Stamp and Create -- Feathers or leaves
Great Impressions -- Holiday card or tag
Robyn's Fetish -- Use metal, real or faux
Stamping Sensations -- Christmas
The Corrosive Challenge -- Fur &/or feathers

We all hope to see you in our new challenge at
Through the Craft Room Door.
Good luck to all who enter!

As always, I would like to thank you for stopping by and spending some time here today....have a great day!!


Monday, November 18, 2013

CWLC #67 -- Anything goes

Today, I'm here to invite you to a brand new challenge at
This week we have the crowd favorite theme of
Anything goes.
I love these challenges because there's always such a huge variety of projects that are shared with us!

Our sponsor this week is SKdigis.
The winner will receive a voucher for $6 (USD) to spend in their shop.
Sonia Kertznus is the creative force behind SKdigis and she is one talented lady!  Her images are fun and fresh with just a touch of silly....
I love 'em!

The Design Team members were lucky enough to get
to choose our own image for this week's challenge.
The decision was a tough one since there are so many great choices.
That was until I saw one with the name "Queen Bee."
Hello!
It was suddenly obvious which digi was meant for me.
The fact that the image is too stinkin' cute only added icing to the cake.
Here is she:

I'm going to consider this my first self portrait. Lol.

I kept the card at an A2 size and very low profile so it could be sent
in my November shipment to Operation Write Home.


You can find this card in the following challenges:


We hope to see loads of new projects this week at 
The theme of Anything Goes allows you to show off any of your new projects.  With the holidays so quickly approaching, I'm sure you've been busy getting gifts and decorations ready.  Come by a share 1 ~~or 2, or even 3~~ with us.  Good luck to all who are able to join the fun!


Related Posts Plugin for WordPress, Blogger...