Saturday, August 31, 2013

Challenge #2 for Virtual Card Making Party

I love the theme for the second challenge in Operation Write Home's Virtual Card Making Party.  Diane came up with the idea to use as many elements on a card using the letters: O, W, & H.  Very clever, I think.

The elements I used are:

O: owl, oval mat for the sentiment, ombre ribbon, orange....lots of orange
W: A Warm Hello, white polka dots on the owl, white mat and shadow for the owl, white ribbon, wide-eyed owl
H: A Warm Hello, harlequin patterned paper

This was a fun one to work on....thanks, Diane!


I've also submitted this card here:
Peachy Keen Stamps Challenge -- Photo inspiration

Operation Write Home Virtual Card Making Party Challenge 1

This morning begins the LaborDay weekend here in the USA and to celebrate that and their "birthday" Operation Write Home is having a Virtual Card Making Party.  This is the first time I've taken part and I'm really excited.  I'm not sure I'll get to all of the challenges this weekend.  But I do plan on completing them before the end of next week and include them in my second shipment of cards.

The master thread for all of the challenges is on the OWH Stars and Stamps blog.  You can find the sketch and linky tool for the first challenge at Nancy Keller's blog.  She is our hostess for the first challenge and has provided a gorgeous inspiration card.

I decided to go with a general winter theme rather than Christmas mainly because I just got the "Snow Cute" stamp by My Cute Stamps and just couldn't wait to use that sentiment.  Just like all of those cards I made yesterday, this is nothin' but scraps.

Here's my card for the first challenge:


I look forward to seeing the other creations in the VCMP and visiting as many of the blogs as possible.  Thanks to all of the gals that are taking time to set up ALL of these challenges!!

Friday, August 30, 2013

Nothin' but scraps

Today was spent clearing through the most narrow bits in my scrap box and I ended up with 21 cards for Operation Write Home!  I am so pleased with that and really proud to say the only sheets of cardstock I cut into were the black for the mats and the white for the sentiments and liners for the dark cards.   Even the card bases were from my previously cut papers.  I try to make sure anytime I have 8.5" x 5.5" pieces left from Cricut cuts, etc I set it aside to use for a base at some point.

I used the same design for all of the cards but used 4 different sentiments.  They were:
*"Remember....I love you" from Little Yellow Bicycle
*"Count your rainbows, not your thunderstorms" from Inkadinkadoo
*"Wishing you rainbows & sunshine" and my favorite "Take a moment to remember how special you are and how lucky the world is to have you in it" both from Papertrey Ink.

Really hope this isn't too many of the same design.  According to the OWH website, up to 30 non-holiday cards using the same design is acceptable.  If anyone knows if that info is inaccurate, please let me know.


Here's a pic of the cards.  It looks pretty crazy with all of them together....makes me a little dizzy actually.  Individually they really are a lot more tame!!


Hope everyone has a great weekend!  Happy Memorial Day to my fellow Americans!!

I love to read your comments so leave some love if you have a minute.

Thursday, August 29, 2013

My first Operation Write Home Midweek Throwdown

Today over at Operation Write Home they are having their weekly Midweek Throwdown.  Today is my first time to participate and the last time a lady named Jan will be hosting.  From the comments I've read, she seems to be a very sweet and talented lady.  I'm sorry I didn't take the opportunity to join in the action sooner. 

The theme for the week is "Thank you" so I put together some cards today that I'll include in a mailing to OWH sometime next month.  I love the little bear image from Stamp Fairy!  It's one that I got for winning a challenge at Sweet Sketch Wednesday with this card.  The sentiment is a combination of stamps from Stampin' Up and Clear Dollar Stamps.

I'm quite proud to say that I didn't cut into a single full sheet of paper!  That's right, folks....nothin' but scraps.  Love that Scrap Wrangler!  Although I don't completely follow the "rules," I'm pretty close and my scrap box is a thing of beauty.


You can find the above individual card here:

Wednesday, August 28, 2013

Back to school with Lacy Sunshine and Elizabeth Dulemba

There have been so many Back to School challenges floating around the last couple of weeks but I don't think I've entered any cards so far.  I've just not been "feeling" the whole back to school season.  Last May my youngest graduated from high school.....and I still get a bit weepy just thinking of not having a son in K-12 anymore.  Hubby and I had 1, 2 or all 3 boys in the same school system for 22 consecutive years.  If we had been in the military, we would be eligible for retirement.  How's that for perspective?

My reluctance to do a school themed card faded quickly when I saw "Jillian" by  Lacy Sunshine.  Oh my gosh.  She is so cute.  That image got my mind spinning so I started looking around for a digi I could use to take Jillian into the classroom.  Along came a freebie from Elizabeth Dulemba.  I found it here.  Take a look there!  You'll find oodles of digis.  Have fun!!

My progress with ProMarkers continues to make me happy.  (I have loads to learn but I'm giving myself some slack since I've only had them for 5 days.)  Today, Jillian became an emerald-eyed ginger and I think she's gor-geous!  I have several others already printed and ready for coloring to use on Operation Write Home cards.  Isn't she just perfect for OWH cards?

You aren't gonna' believe where I came up with some of the embellies for this card!   It's almost embarrassing to tell you how cheap frugal I am....actually, no it isn't.  I'm pretty proud of my ingenuity and love hearing stories of others finding their own treasures in thrift stores, tag sales, etc.  Here are some of the unconventional sources for today's card:

*The little button was the extra button from a shirt.  You know, the one that's attached in the little plastic baggy?  Love those!
*The beads and the white cord tied to the button are from a kit of beads from the Dollar Tree.  They were in the kid's craft section.
*The heart in the upper right corner was white card stock that I covered in Glossy Accents.  (I had just gotten the stuff and had to play with it.)  It had been in my stash for months now and it was time for it to be set free.  I didn't want a super white heart on the card so I turned it over and used a couple of ProMarkers on the back side.  I'm kinda' loving the way it turned out.
*The sentiment was printed with my little label maker to emphasize the school theme.  I thought Jillian looked like she might have a sassy side to her so I added a touch of sarcasm.
And best of all:
*The little bit of pink grosgrain ribbon that's under the heart and across the bottom of the card came from.....drum roll, please......the drawstring of an old pair of pajama pants.  That sounds a little weird but I assure you it is clean and fully laundered.  I guess me saving that is hereditary.  My Mom is a phenomenal ribbon saver and I am following closely in her steps.  (If I could have gotten her cleaning gene, my house would have far fewer dust bunnies.  Oh well.  I'll take the ribbon and just live with the bunnies.)

Now, time for you to take a look at that beautiful little redhead:

The frame was cut using my Cricut Expression and the Elegant Edges cartridge.  It was the very first time I had used the Center Point key.  And, yes, I cut her out before I colored the image.  The thought of screwing up a completely colored digi makes me just a little sick.  Luckily, it was pretty successful and I love the effect of the finished product.

You can find Jillian and her books in the following challenges:


Lacy Sunshine -- Girls, girls, girls
By Lori Designs -- Back to school
Outlawz Friday Alcohol Marker Challenge -- Back to school
Perfect Sentiments Challenge -- Goodbye summer, hello school
The Sisterhood of Crafters -- Back to school
Stamp-n-Doodle -- Back to School
Going Grey with Scrap Creations -- Back to school
Tuesday Throwdown -- School colors
Craft Your Passion -- Office supplies
Love to Create -- Back to school
 

Once again I'd like to thank you for the time you've spent here.  Please leave me a comment if you have an extra minute....and I'd love to have you as a new follower!

Tuesday, August 27, 2013

My first swing fold card and Melonheadz

Today I decided to make a swing card.  The couple of video tutorials that I watched both used a Sizzix Big Shot.  I don't have a Big Shot so I needed a work around.  Enter my old school Creative Memories circle cutting system.  If anyone is interested in the how to's of that, let me know and I'll put together a pic tutorial.

The details of this card make me smile.  Here are some the highlights:

*I used sandpaper for the sand on the beach.  (It's 100 grit in case a certain Master Woodworker to my west is reading this.)
*The trunks of the palm trees were hand embossed using a stylus on the reverse side of the paper.  Then they were lightly inked with Tim Holtz walnut stain distress ink.  I started with kraft cardstock so there would be lots of shading.
*The fronds of the palm tree were given veins, again using my stylus.  They were inked using TH forest moss distress ink.  I cut 2 layers for each of the trees so I could layer them.  That cut along with the shells and sandcastle are all from good ol' Create a Critter.
*Also from Create a Critter, I cut one of the clouds and used that as a mask to ink the sky.
*The ocean waves were embossed using the Sizzix Swirls folder in my Textures.  (Probably my most used folder.) I then cut along the swirls to give the appearance of waves.
*Along the top of the sandpaper, I used Marvy's Liquid Applique to give the effect of foam on the beach.  If you're not familiar with Liquid Applique, it's really cool stuff!  A bit like puffy paint except that when you use your heat gun on it, it gets all lumpy and bumpy.  I have grand plans for using it on Christmas cards....lovely piles of snow await.
*The shells and sun were all hand embossed using my stylus to give them some dimension.  

I found the super cute little hula gal at MelonHeadz Illustrating and it was free.  In fact, there are loads of free digis over there and they are fantastic!  Really sweet images!!  Thanks so much to Nikki for so generously sharing.  It's truly appreciated!!

Now, on to the card.


How does one girl get so lucky?

I am surrounded by some of the sweetest, most generous people on earth.  Within the last 24 hours, I've gotten little surprises from 2 different people.  Both times have given me a serious case of the warm fuzzies.   So I just had to do a quick post to let both of them know how much I appreciate their thoughtfulness and support.

Yesterday, when hubby got home from work, I saw him get out of the car with 2 new paper stacks in his hand.  Gasp.  Had he actually voluntarily gone to a craft store to get me a present?  NO.  A young man he works with sent them home for me.  He had been at Joann's and found a good deal and thought of me.....Altogether now: aaaaaah!
Troy is one of hubby's "lunch cronies" as I call them.
He's cute as a bug, smart as a whip, and obviously sweet as can be.
Now I need to make some sort of fantastic card for him.
That one's going to take some serious thought and planning.


Then, just a few minutes ago, the UPS man dropped off a package from Amazon.  Strange.  I didn't remember ordering anything that would come in that size or shape box.  Oh well, stranger things have happened.  I opened it and inside was a new Swingline guillotine trimmer.  There was also a gift note the said, "Just 'cause. Love, Mom."  Now I know a lot of you probably think you have the best Mom and I'm sure she's fantastic but I have the best Mom.  


To both Troy and Mom:  Thank you. Thank you. Thank you!

I'm truly a lucky girl and still can't stop smiling thinking about my new goodies!

PS.  Hubby does get me all kinds of stuff....
just not a craft store shopping alone kinda' guy.
I'm sure he's afraid he'd get the wrong thing.
(FYI, honey, Gift Cards are always right.)

Monday, August 26, 2013

Mo Manning's "Biker Babe" may just be the cutest biker. Ever.

Okay, so yesterday I was telling you how I had found all of these free digital stamps.  Well that is really true....but I still had to buy some.  Since I just started using digis and markers, I had only the few I had been lucky enough to win in a couple of challenges.  If my file folders of images were cupboard shelves, Old Mother Hubbard's dog would definitely go hungry.  That needed fixin'.

One of the online shops that I could do some serious damage in is
Mo's Digital Pencil.  Holy cannoli, Batman!  That gal can draw and has such a sweet sense of humor in her images.  Love.  Love!  LOVE!  Everything I looked at was something I wanted but I limited myself to just 5.

Today I used "Biker Babe" and cannot get over how funny this little guy is!  I added a sentiment from Inkadinkadoo that seemed like it made a perfect pairing.  I did cut the top and the bottom off of the sentiment stamp to get just the quote.  (No worries.  I do this all of the time.  Carefully.  And the pieces of my stamps fit back together like a puzzle so they can be used altogether or separately.)

The cardstock I used is Papertrey Ink and Bazzill.  The designer papers are from the DCWV Tattered Time and Natural stacks.  I found the gears and little clock charm in the jewelry/beads section of Michaels.  They're much less expensive than some of the embellishments that are "for paper crafts."  The ribbon was in the $1 ribbon bin at Michaels and the brads are Recollections.  The pin is Tim Holtz.  (Love Tim!)  Sadly, it doesn't show very well in the pictures but there is Glossy Accents on the bottles.

And now, without further ado, here is my card for today.


Did I tell ya' the little stinker was cute or what?  The tattoo on his arm absolutely cracks me up!  Of course I had to color his shirt and glasses in Harley-Davidson colors.  I'm sure he has a Hog.

You can find this card at the following challenges:

Mo's Digital Challenge -- Happy Birthday
'ABC' Challenges -- No flowers
Challenges 4 Everybody -- Anything goes
Color Me Creative -- Anything goes
Eclectic Ellapu -- An oldies birthday
Great Impressions -- August challenge: square cards
Kitty Bee Designs -- Birthdays
Outlawz Twisted Thursdays -- Your favorite thing
Crafty Bloggers Network -- August: your favorite thing
Pile It On -- Designer paper


Thanks so much for spending time here today!
Your visits and comments really make my day!!

Sunday, August 25, 2013

Saturated Canary's "Boobie Love" digi with thoughts of Michele

This morning I started searching around for digis to use as practice with my new ProMarkers.  More specifically, I was looking for free digis.  My Mother very successfully raised a cheap frugal daughter.  There are loads of free images out there and I came across several that are real keepers.  A later post will be about the different sites that offer several freebies so be sure to check back for that.

As I was looking, I found a phenomenal one for a PENNY.
Yes, one red cent!
It's from Saturated Canary and is called "Boobie Love."
A kinda' racy name for a super cute image that's, of course, meant for the support of breast cancer victims and survivors.  I had to have it.  No two ways about it.  (I also paid for one of their other images....it was so hard not to buy more.  Their site is chock full of yummy images!)

While I was working on this card today, my mind kept drifting to thoughts of a gal my hubby and I graduated high school with.  Her name is Michele, her spirit is indomitable, she is breathtakingly beautiful, and she is currently battling breast cancer.  She wasn't able to make our 30th reunion a couple of weeks ago and was sadly missed.  I look forward to seeing her at our 35th...if not sooner.

Before I get myself worked up too much, here's my card.
For Michele.
Sparkle on, Chica.


This card has been used as my entry for a Design Team call at a brand-spanking new challenge blog.  I'm so excited for the activity to begin at Dreamtime Designs.  An opportunity to be on a design team is exciting enough to me...get to play with all sorts of new digis, techniques, themes, etc....sign me up!  But to be able to be the part of an initial DT is really intriguing.  To get to say that "I knew them when" would be really awesome.  Wish me luck.
(I feel like I'm jumping the gun a bit given the fact I've only been blogging for literally 4 weeks.  But then again, I do like to live by the attitude of "Sure.  Why not?")

In addition to the above mentioned DT call, this card can be found in the following challenges:

Sentimental Sundays -- Ombre hair
Color Me Creative -- Anything goes
Link Up for Pink -- Challenge #16
2 Sisters Challenge Blog -- Square cards
Crafty Sentiments -- Colorful
Pile It On -- Designer paper
Love To Scrap -- Bingo: flowers, die cuts and bling
Joanna Sheen Challenge Blog -- Pretty in Pink
Loves Rubberstamps Challenges -- Round or square cards
Crafting By Designs -- Mixed media


If you have any questions about any of the materials used, please feel free to email me!  I appreciate your visit and would love to read your comments.  So  leave some love if you have the time!

My first real attempt with alcohol markers

The first month of entering card challenges has definitely taught me a few things....several actually but I won't go through every single one.  Here are some that are the most obvious to me are:
#1. I love card challenges!  The way they have made me stretch my horizons is fantastic.
#2. There are so many different styles of cards that really appeal to me.  I'm having a blast trying out so many new techniques, etc.
#3. Coloring rubber stamps and digis takes your projects to a level of artistry that I want to achieve.

Those three reasons led to me to purchase a nice starter collection of ProMarkers by Letraset.  Naturally, I've been watching some YouTube videos to familiarize myself with them.  I've learned a bit but I knew that until I had the markers in my own ink stained hands I wouldn't have a real feel for what I am able to do with them.

A couple of days ago, after I received the markers in the mail, I sat down and started playing a bit.  Sadly, I was using the wrong kind of paper and the colors bled somethin' fierce.  Frustration sat in and I became very discouraged.  So back to YouTube I went and it was then that I found out what a huge difference your paper choice makes.  Off to Walmart hubby and I went yesterday.  I got a pack of the Georgia-Pacific 110# cardstock.  Yowzer!  What a great paper that is to work with using my new ProMarkers!

So, I'd like to share my very first real attempt at using alcohol markers.  I am pretty proud ecstatic with the results.  There's so much for me to learn but I really feel like this is something I'm going to enjoy improving upon and I think I have a pretty solid starting point.

The digi I used is "Watering plants Ivy" from Little Blue Button Stamps.  It was one that I chose after winning one of their challenges with this little bat card.  The papers are from Papertrey Ink and SEI.  The sentiment is one I printed using Word.  The ribbon and brad are from my stash.


I would also like to mention one more thing I have found to be very true about the card challenge community: You meet some really sweet, funny, and talented individuals.  The wonderful comments of support have just been such a joy to read....thanks to all of you!

And now a very special word of thanks to a wonderful lady who has been so lovely and supportive.
Thank you so much on your advise about the ProMarkers, NanaConnie!  

Thursday, August 22, 2013

Monochromatic Christmas for the Outlawz

The challenge posted on Monday for Outlawz is a really fun one...monochromatic.  I think monochrome cards, rooms, outfits, etc are so classic and elegant looking.  I was really excited when I saw the Design Team had chosen that.  Never ones to disappoint, they offered up some great inspiration pieces.  You can go check the Design Team's work out here.

Here is my entry for the
Obviously, I went with tones of brown and for some reason felt like a Christmas card was the way to go.....not sure why.  But I'm glad I followed my instinct because I personally love this card.  If you've followed my blog at all, you know that I don't normally use a lot of bling.  It kind of scares me.  Or at least it used to scare me.  I'm feeling more confident.

This new found confidence does present a problem: I want to use more embellishments but I don't have a huge amount.  I'm really trying to resist the urge to head to Michaels, JoAnn, or Hobby Lobby.....or all 3.
(In my area they're nearly a stone's throw from one another.  It feels like the Bermuda Triangle of crafting.  I could go in one day and never come back out.  Scary and intriguing at the same time!)

In order to prevent any need for rescue, I decided to turn to my inner "scrounger" and started digging through boxes.  Here's a break down of what I found:

  • Button had been the extra from some long forgotten shirt.  
  • An old floral spray that had been on top of a gift box from my Mom years ago.  I pulled it apart and used the glittery balls in the bottom left corner and the beads that are on the stick pins.  The pins were from my days as a florist.  (Loved being a florist but do not miss making corsages.)
  • The cluster of "pearls" were from an old pair of earrings.  I have no idea where they came from but they were still on the original hang tag.  This is just one earring so there will be another card eventually with the mate.
  • Crown charm, pearls, paper poinsettia, and rhinestones all came from the Michaels Dollar bin.  (If they would let me, I would go swimming in there to find the yummies I'm just sure are buried and forgotten.)
  • Glittery leaves around the fussy cut poinsettia are from a package of Making Memories goodies I got from Peachy Cheap.

I did that break down to demonstrate that not all crafting needs have to be found at the predictable places.  Thinking outside of the box is challenging and the feeling of getting something for nothing is a rush for me.  Do you have suggestions on where to find the best bargains on embellishments or any other supplies?  Share your hints in the comments....I'd sure love ya' for it!

And now, after yet another mile long post, here is my card.


In addition to the Outlawz challenge, you can find this card at the following challenges:

Crafting by Designs -- Mixed media
Loves Rubberstamps -- Round or square cards
Papertake Weekly Challenge -- Flower power
Love to Scrap -- Bingo: flowers, sentiment and ribbon
The Stamping Chef -- Christmas in August
Creative Belli Blog -- Glitter
Hobby Cutz Challenges -- Create your own background
 Challenges 4 Everybody -- Anything goes
Christmas Cards all Year 'Round -- August challenge
Little Blue Button Stamps -- Bling


If you have any questions about any of the other products used in this card, please feel free to email me.  I always appreciate the time you spend looking through my rambling and would love to see your comments!

Little side-steppin' camper

This week at Fantabulous Cricut Challenge Blog they have a "Summer Camp" theme.  Here is the card that I made specifically for that challenge....although it may just find its way into a few others if I can manage it.

For my very first side step card, I'm pretty pleased with the results.  I really look forward to doing one with a more sophisticated look.  Loads of flowers and lace come to mind for my next attempt.


A night scene just seemed in order for this card.  I used several Cricut Cartridges along with Craft Room to manipulate the shapes and sizes of some of the cuts.  Craft Room also helped hide the contours.
*See hint below for removing contours.

The cartridges used for this card were:
Baby Steps
Create a Critter
Old West
Straight from the Nest


You can find this card in the following challenges:


Fantabulous Cricut Cuts -- Summer camp
Crafty Sentiments Designs -- Colorful
Simply Create Too -- For a child
Milk Coffee Challenge --Bon Voyage, Vacation
Sarah Hurley Challenges -- Texture and dimension
Digistamps 4 Joy -- Anything goes
ABC Challenges -- Lots of layers


If you have any questions about any of the materials used, please feel free to send me an email.  Like always, thanks for taking a look and I hope you'll leave me a quick comment!

* Hint about removing contours with Cricut Craft Room:  When trying to remove the teeny tiny contours on some cuts, I've found it so much easier to zoom in on the mat.  After hitting the "Hide Contour" button for you image, on the top task bar (just to the right of the words "My Projects") you will find 2 little magnifying glasses.  Click on the one with the plus sign until all of the littlest of the contours are more visible and them begin removing them.  You may need to chase the image around on the screen a bit using the scroll bars on the side and bottom of CCR but it's abundantly easier for me this way.  No more trying to get my cursor in just the right spot for that itty bitty line.  I hope this can help some of you.

Wednesday, August 21, 2013

A day late for a couple of things.

So far this morning I've:

#1. Found out the color challenge I had made this card for is now closed.  The color combo isn't one I would typically have chosen for myself so it was a good one to make me go outside of my comfort zone a bit.  I just wish I had paid closer attention to the closing date.  While I would like to say that it was a lesson learned, it probably wasn't and I'll do the same thing again.  But if the resulting card(s) is/are as satisfying as this one I'll be perfectly okay with repeating this particular history.  So, overall, no biggie.

#2. Realized I forgot to call my Father on his birthday yesterday.  In my own defense, the confusion stems from the fact that he celebrated his "24th" birthday yesterday and I had the number 24 stuck in my brain this year.  I honestly thought I had until August 24th to call and wish him a happy day.  So, instead, I'll be calling him later and wishing him a belated happy day.
(It was his 45th annual "24th" birthday for the record.)

So, can I just go back to bed and wake up yesterday morning and try this all over again?  No?  Alright then here's the card I made using some really bright colors.  They are beautiful together just not my usual choice.  I also used a lot more embellishments than I have in the past.  I'm really drawn to the cards that I see that are blinged out to the hilt....just inexperienced in the making of them. 


The hummingbird cut is one from the Cricut Art Nouveau cartridge that I love.  It has an elegant look to it and the layering is easy as can be.
Double love.
This cart is one that I don't see mentioned in many places and that's really a shame.  There are so many fantastic cuts here!  Do keep in mind that many of the cuts are super intricate and require a large size to be able to work with them.  Even with that limitation, I think it's one of my stand out carts and worth every penny I spent on it.
(Which was naturally a sale price or Ebay deal....
never full retail for this ol' girl.) 


Since I'm not one to ever leave well enough alone, I decided to make my first twisted easel card using colors I'm not comfortable with and a style I'm inexperienced in.  Sure!  Why not?  I'm so happy I did!  Talk about easy peasy for huge impact.  Again, YouTube provided a couple of videos that walked me through the process and now I have a new fancy fold in my card making arsenal.  My hubby loves cards that have any sort of action, pop up, etc so this one is right up his alley.  I guess it's the little boy in him that these appeal to so much....I don't question it.  I've decided to find it charming.


You can find this card at the following challenges:

Bitten by the Bug 2 -- Summer heat is for the birds
Love to Scrap -- Bingo using flowers, ribbon & sentiment
Mojo Monday -- Sketch
Avenue 613 -- Anything goes with a twist: stitching
Hiding in my Craft Room -- Stitching
Craft your Passion -- Summer flowers
Crafty Sentiments -- Colorful
Loves Rubberstamps -- Round or square cards
Papertake Weekly Challenge -- Flower power
The Paper Girls -- Photo inspiration


Recipe for this card:
Paper: Bazzill, Papertrey Ink, and SEI
Lace, seam binding, and ribbons:  Martha Stewart and my stash
Metal brackets: Making Memories
Rhinestones: Michael's dollar bin
Cricut Cartridges: Elegant Edges, Flower Shoppe, and Art Nouveau
Sentiment stamps: Papertrey Ink


My day has gotten better since I started typing this post.  My hubby had already planned on taking today off (much needed and well deserved) and he took me out for some brunch.  I hope you enjoy your day and appreciate that you took the time to visit.


Tuesday, August 20, 2013

Operation Write Home

For many months now, I've been wanting to donate cards to the great organization Operation Write Home but just haven't done it.  I guess I've been a little weary about whether my cards were good enough or not.  Our hero soldiers, sailors, airmen, marines, etc deserve the best to be able to send home to their loved ones.  My game needed to be stepped up a bit before I felt comfortable contributing.  Now, I think I'm ready.

If you're unfamiliar with this group of card makers, I hope you'll take the time to go look at their site.  Also check out their YouTube channel for some really incredible tutorials.  Sandy Allnock, OWH founder and president, is fun and talented beyond words.
(Some might say she's a bit goofy.  That adds tremendously to her charm, in my opinion!)
The things this gal can do with paper and ink
astonish and inspire me.

I've been working on "Thinking of you" and just general cards.  That sentiment is in short supply at the central mailing point for my section of the country according to the OWH site.  So that's where I started.  That sentiment, a few sketches, and my lovely scrap box (see note below) were my companions off and on for the past few days.....along with Pandora on my tablet.  Love my Pandora!

Here are a few photos of the assortment I sent.  It's only 25 cards to begin but I'm really happy I've started contributing.


If you're interested in doing some type of volunteer work, I urge you to look at OWH.  I truly believe the members of our military are the best in the world and this is just a little something we can do to show our gratitude.

NOTE:  I really do love my scrap box thanks to a video posted by Sandy Allnock.  And be prepared, she definitely plays the goofy bit to the hilt in this one!  But, I've followed her advice and I'm amazed by the difference it's made.

As always, I appreciate you taking a look at my ramblings and would love to read your comments.

Monday, August 19, 2013

Cutesy little puppy book card

Over at Peachy Keen Stamps Challenge Blog they have a Friday challenge every week.  I did not know that!  How did I not know that?  I'm both disappointed in myself for not knowing and super excited to find out about it.  This gives me another reason to pull out some of those sweet little faces and stamp away!  Let me add, not only are they sooooo cute but they are also some fantastic stamps.  I get consistently crisp, clear images when I use them.

This week's challenge is for a 3-D project with a pet theme.  I decided to make a "book" card.  (Yep, I watched YouTube videos to learn this technique....there are several over there.)  This project took a little bit so much longer than it should have.  Not because it's a difficult technique but because I have what I've termed CMADD. 
Card Making Attention Deficit Disorder.
One idea seems like a really great thought for a time and then, wham, my mind gets hit by a lightning bolt and the project takes an entirely new direction.  I can't be the only one who suffers.  Perhaps we should organize a support group?

Here's my project:


Here are the materials and tools used in this card:
Stamps- Peachy Keen, Papertrey Ink, and one unknown
Papers- Bazzill, Papertrey Ink, and packages from Michael's dollar bin
Inks- Tim Holts distress ink, Memento Tuxedo Black
Baker's twine- We R Memory Keepers
Cricut Cartridges- Create a Critter, Straight from the Nest, Elegant Edges


You can find this card at the following challenges:
Peachy Keen Stamps Challenge Blog -- 3-D pet theme
Bastel-Traum -- Color challenge
Die-Cut-Divas -- August sketch
Drunken Stampers -- Use twine
ABC Challenges -- Lots of layers
My Craft Spot -- 3-D
Try It Tuesdays -- Create a scene

And I've shared this card at Facebook A Card A Day.

Friday, August 16, 2013

Hello, Lovely

First things first.  I'm not sure if this is a question or a rant.
The Disney Classics cartridge from Cricut.
Ugh.
I've tried several of the images and wind up getting really frustrated with them, my Expression, myself, and everything around me....Kind of the butterfly effect of crafting irritation.  Some of the pieces are so small insanely microscopic!  I realize that I just need to do larger cuts to increase the size of the smallest components.  But how flippin' big do you need to cut them so you can even see them?  The images are super cute; it just drives me nuts that I'm not able to use them.  Does anyone have any suggestions, a list of minimum sizes recommended, hints, clues?  I'll be happy to accept any help offered!

Whew.
I feel so much better.
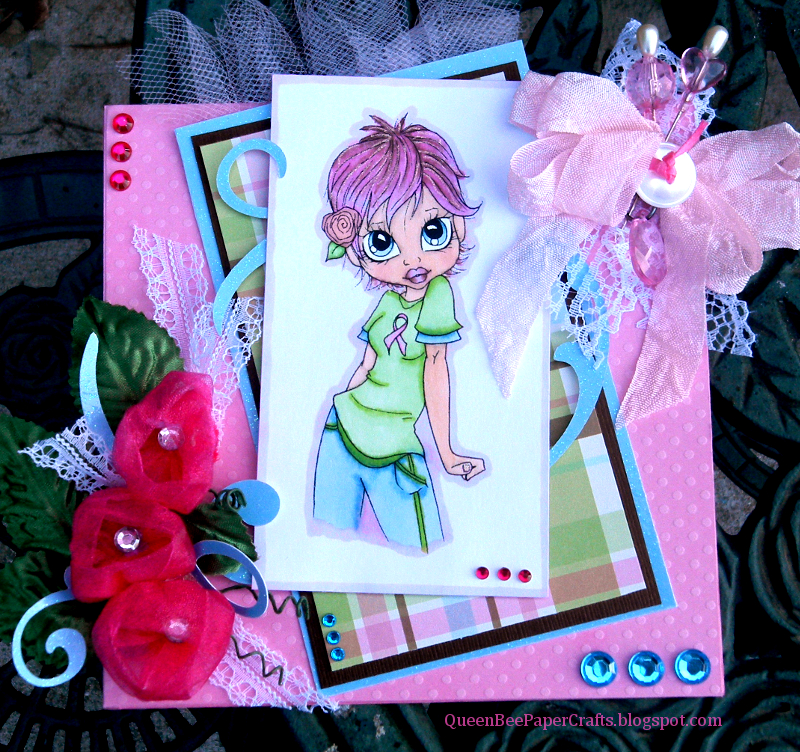
Now, with all of that being said, I'd like to talk about a card I made using you know what.  Yep, I took a chance on the Disney Classics cart again today.  I decided to keep it as simple as possible so I used the adorable Flower from "Bambi."
Only Walt could have made a skunk so stinkin' cute.
(Couldn't resist.)

I removed the contours from the white layer in Craft Room because I have a problem making my layers match perfectly and those little lines only make that more obvious.  That issue is all me.  It has nothing to do with which cart I'm using.  I'm just messy.

The roses on the card were made using Flower Shoppe and their edges were inked with Distress Ink.  That great sentiment is from Papertrey Ink.  The pearls and ribbons were from my stash.


You can find this card at the following challenges:

Really Reasonable Ribbons -- Pink & brown ribbons
Outlawz -- Wednesday sketch
Exploring Cricut -- Disney dreaming
Jellypark Challenges -- Cuddly wuddly
Inspire Me Fridays -- Anything goes #116
Digi Sketch Challenge -- Make your own flowers
Hiding in My Craft Room -- Thread/stitching
Craftin' Boutique Challenges -- Anything goes


Sorry for the vent.  But, my husband will be happy I have this outlet to get that off of my chest before he gets home.

Hope you have a fantastic weekend and, as always, would love to hear your comments.

Thursday, August 15, 2013

Blingin' it up with little actual bling


This is a card I made for a very special young lady who's about to turn Sweet 16.  Can ya' guess her name?


When I saw the challenge at Little Blue Button Stamps is for "Use Bling" I knew I needed to submit this card.  While there is technically only a tiny bit of bling used, I feel like it's glitzy enough to be appropriate for the theme.

The birthday girl's favorite color is blue so I decided to go with every shade of blue I could find.  The background paper was stamped with a combination of stamps from Tim Holtz, Inkadinkadoo, and Hampton Art.  The name was done using an alphabet set from Recollections.

I used the Cricut cartridge Wall Decor & More for the dress form.  (There are a lot of hidden gems on that cart.)  It was cut 3 times using Bazzill kraft cardstock and the layers glued together.  It would probably have been easier to just use chip board but I rarely do things the easy way.  The dress is a combination of another dress form cut which I trimmed down by hand, some aqua tulle, and a bit of micro ribbon.  Plus, that's where I added the one rhinestone.

I used the ends of a glittered frame from my stash for the edges of the name.  My Crop-a-Dile easily punched holes into it for some brads.

The card was done in the center step style.  Thanks to The Outlawz and one of their last challenges, I'm going to keep that kind of card close to the front of my mind.  It's easy peasy and makes great impact.


You can find this card here:

Little Blue Button Stamps -- Use bling
Craftin' Boutique -- Anything goes
Crafting By Designs -- Anything goes
Creative Belli -- Glitter
Outlawz -- Twisted Thursdays: mixed media
Sweet Stamps -- Bling

As always, thanks for stopping by!
Related Posts Plugin for WordPress, Blogger...