Showing posts with label Just Inspirational Challenges. Show all posts

Tuesday, December 24, 2013

Just Inspirational Challenges and Papercrafting World


Welcome to a new challenge at
This week we would love to see your gift wrap projects.  So if you've made some really cute gift bags, boxes or tags it's time to show them off!

Our sponsor this week is

While surfing around YouTube recently, I came across a lovely lady who goes by the moniker Pootles Papercraft.  She is awesome!  There are several projects using an envelope punch board that really intrigued me and worked straight into this challenge.  I made Sam's tab tie box and added the adorable Elf in Medallion image to the front of the box.

In this photo you can see that the DSP I used
for the box split at my score lines.
To camouflage this, I just inked around
all of the edges.

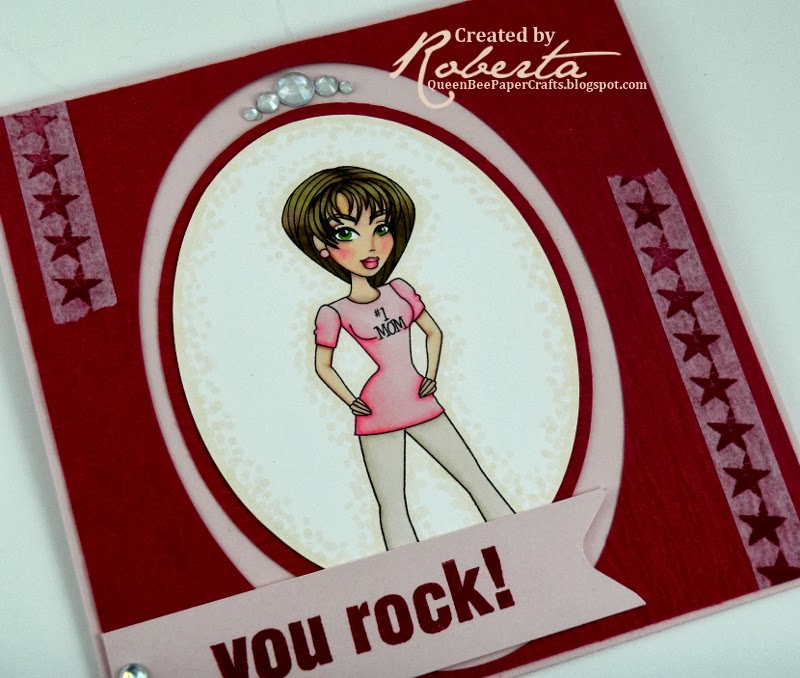
I used my ProMarkers to color this silly
little elf.

Please take the time to go check out Sam's great video.  You'll be amazed at how easy this box is to make.  I'll definitely be doing more of these.  And I really look forward to trying more of her projects.  Of course, this cute little elf from Paper Crafting World will be finding it's way on to some of those projects!

All of us on the Design Team at
would love to see your gift wrap presents.


Thanks so much for stopping by today.
I would like to wish you a very Merry Christmas!!


Monday, December 9, 2013

Just Inspirational Challenges -- Washi Tape

Welcome to a new challenge at

This week we would like to see you use
Washi Tape.
This is washi tape that I made.
It's so simple!  You just need some
tissue paper, a Xyron sticker maker,
a stamp and some ink.
I hope to get a tutorial video made soon....

please check back!

Our sponsor this week is
 

Each of us on the JIC Design Team were lucky enough to choose an image to use for this week's challenge.
I decided on the super fun #1 Mom.
It just seems like a great year-round image.
For the 'tail' on the sentiment banner,
I used my envelope punch board.
Just line the center of the strip of paper up
with the center of the punch and snip away.
One easy cut!


Items used to make this card were:
Coloring medium:  ProMarkers
Cardstock:  Papertrey Ink
Textured Cardstock:  Paper Temptress Red Crepe Ruche
Rhinestones:  Studio G
Stamp:  Michaels Dollar bin
Creative Memories Oval Cutter,

This card can be found in the following challenges:


Thanks so much for stopping by today!
I hope you have a great day!!


Tuesday, November 26, 2013

Just Inspirational Challenges -- Rosettes

I'm really excited about the new challenge at
this week!
We have a great theme and a great sponsor.  
So this should be lots of fun for you!!

Our theme this week is:
Rosettes

And our generous sponsor is:
The Paper Shelter

This is the great image I chose to use for the challenge.
It's called "The turkey is ready" and you can find it along
with a pre-colored version and coordinating backgrounds
here.  All for one low price!
Don't we all look just like this after cooking a complete
turkey dinner?  Lol.

When I learned the theme of the challenge, I went straight to YouTube to find some tips on making rosettes a bit more efficiently.  I had made them in the past but it just seemed to take a really long time for me.  Turns out I just needed more practice; I was already doing them correctly.

While I was looking through the various videos, I came across a great video by LisaEDesign.  She's generously allowed me to link to that video here.  Lisa shows how to use the design of chevron papers to really change up your rosettes.

Her inspiration spurred me on to creating several different rosettes out of just 3 different papers.  Here are photos showing those differences...sometimes the changes are subtle but still make for interesting results.

These 2 rosettes were cut and folded at the same measurements.
However, the one on the left has the outside points folded down
while the right one has the outside points folded up.
The difference is definitely subtle on this paper pattern.

These 3 really start to show the differences of how
the cutting and scoring are done can make dramatic changes.
The rosette in the lower left was scored at every point
(upper & lower) for a much tighter result.
The one in the center was scored at just the lower points.
The final rosette was scored at the upper points.
Switching the points that are scored along with leaving
different color bands on the outside of the rosette gives
a completely different look.  I love those 2!

Because of the great color combo on this chevron paper,
I wound up with some very obvious differences in these rosettes.
All 3 in the left inset are close to the same size and are all scored at the upper and lower points.  Just the colors of the stripes changes the results in a really great way.
The 3 that are in the right inset, are the results of mistakes.
I tried to make a much larger rosette with the one on the lower left.  The strip I worked with was 12" long by about 3 3/4" wide.
If I had added another 4-6" to the length, it would have been fine.
Since I didn't, it split at one of the score lines when I was gluing it together.  Phooey.
The other 2 were scored at just the lower points and should have been at every point....again 'splitage' occurred.  Double phooey.
Instead of tossing them, I took my scissors and trimmed each score line to the same point of the tear.
Suddenly, I have dimensional snowflakes with a chevron pattern!
Love it when I can salvage something.

I decided to make a wreath with the rosettes I'd been playing with and that awesome image from The Paper Shelter.
The base for this rectangular wreath is chipboard wrapped in
burlap ribbon.  After deciding on the placement of the rosettes, the image and the sentiment banner, I used hot glue to adhere everything to the base.

The centers of the rosettes were all embellished
with buttons and brads from my stash.
You can see that one of the rosettes isn't in a chevron pattern.
I flipped the one on the top center over
to use the polka dot paper on the reverse side.
The pop of red just felt like it needed to be there.

You can find this wreath in the following challenges:


I would like to thank Lisa once again for the fantastic video!
(Click on her name here to go take a look at her fab blog too.)
Playing with the different patterns, scoring and folding was a lot of fun....I'm obviously easily entertained.
Hopefully you've found some inspiration to try your hand at rosettes too.  They're such an inexpensive way to add huge impact to projects.

Please hop over to Just Inspirational Challenges
and take a look at the other Design Team members' projects.
We all hope you'll be adding your own new rosette project
to our challenge this week.
Have fun and good luck!!

Thanks for the time you've spent here today.


Tuesday, October 29, 2013

Just Inspirational Challenges & Delicious Doodles

All of us on Team B at
would like to thank everyone that joined us for our Brads challenge.  What a simple embellishment and yet so many great ways to use them!
We really have some talented folks entering our challenges...hope to see you all back this week and lots of new faces, too.

For this week, our theme is
Kraft paper

Our fabulous sponsor is

The lucky winner will be able to select some of the coolest digis available!  The variety at Delicious Doodles is incredible.  If you're looking for something a bit edgier, you'll love their images.  There are also some very feminine ones.  I think everyone will be able to find something that suits their fancy.

This week, I've really stepped out of my usual comfort zone and attempted to do something a bit Steampunk.  I'm not real familiar with the style so if I failed miserably, please be kind with your remarks!


This hot little Mama's name is Steampunk Sally and she looks like she has a "Take no prisoners" kind of attitude.  My kinda' chick!


Since our theme is Kraft, I printed and colored the image on Kraft from Paper Temptress.  It is the Colored Brown Bag Kraft that I've recently become addicted to using for coloring.

The paper used for the clock and the dry embossed mat at the bottom of the card are also from Paper Temptress.  It is the Eggplant Brown Bag.  I love the texture the sanding gives the embossed mat.  Since it is kraft core, it really adds a lot of visual interest.


In the photo above, you can see a bit of the dimension from the skull and cross bones.  I printed the image on white paper as well as the kraft.  The skull and cross bones was covered with a thin layer of Glossy Accents and fussy cut after it had dried completely.  It was then just paper pieced onto the colored kraft.


I used is a Tim Holtz sentiment stamp that fits Sally's attitude perfectly.
"One of the advantages of being disorderly is that one is constantly making exciting new discoveries."
Love that!!
The quote is actually from A. A. Milne,
most famous for "Winnie the Pooh."

Other supplies used for this card:
Coloring medium: ProMarkers
Paper for card base: Bazzill
Designer Paper: DCWV Tattered Time stack
Charm, gears and clock hands: Michael jewelry dept.
Rustic twine: Etsy

Everyone at Just Inspirational Challenges is excited to see your new creations using kraft paper this week.  Good luck to all that join us!!

Thanks so much for spending some time with me today.
I'd love to read your comments!


Tuesday, October 15, 2013

Just Inspirational Challenges -- Team B

Today opens a brand new challenge at


We're all so happy to have
as our sponsor this week.  The lucky winner will have the opportunity to choose some of the incredible digis available in their store...and there is a great assortment.

Our theme for this fortnightly challenge is:
--Brads--
They're such a great, inexpensive way to embellish a project.
Let's see how you decide to use them.

For my project this week, I've made a card using the hilarious
"Flu Shot" image from Stitchy Bear's.
Doesn't she just make you giggle?
This card was made to be sent to an Uncle of mine who has seen more than anyone's fair share of nurses over the last several months so I kept the design very CAS.  I knew which papers I wanted to use....thank you very much to my scrap box and since blue was the main color of the body of the card, I really wanted to add some to the image as well.  Blue hair, of course!  The brads I used also brought more blue to the image area.

Confession time:  I had not intended to place the brads in that position....however, the smudge of red ink that mysteriously appeared after I had already matted the image changed my mind.  I have no idea who else had been touching my card but I'm sure I didn't leave a smudge.  Things like that just never happen....

The other items used in this card are:
Papers:  Bazzill, Studio G from Michaels Dollar Bin
Brads:  Recollections
Colored with my ProMarkers

You can find this card in the following challenges:

Bearly Mine -- Anything goes
Through the Craft Room Door -- Anything goes
Songbird Challenges -- Blue Hawaii
Use It Tuesday -- Scraps, pieces, odds & ends:  banners are all scraps
Digi Makeover Challenge -- Clean and simple
Pile It On -- Humor
Robyn's Fetish Challenge -- Square cards only

We hope to see lots of items submitted for this week's Brad themed challenge at Just Inspirational Challenges.  Good luck to everyone that joins in the fun!

Thanks for spending time with me today.
I hope you take a minute to take a look at my Blog Candy.
Just click on the pic at the top of this page
and follow all of the simple steps....
It's a great assortment of goodies!


Tuesday, October 1, 2013

My first card for Just Inspirational Challenges

A little over a week ago I received an invitation to join the Design Team at Just Inspirational Challenges.  I'm a member of Team B and I couldn't be happier to be there!  They are a group of very talented and friendly ladies.  I really look forward to working with all of them for the next few months!  You can find links to each of them in my right side bar....go take a look at their blogs.  I'm not exaggerating when I say they're really talented! 

Today marks the opening of a new challenge at Just Inspirational Challenges.  It's one of my favorite challenge themes:
Bingo!
You know the drill.  Just decide on 3 squares in a straight row and use those elements to create your project.
Here's the bingo board for you:
This week Team B is lucky enough to have Penny Blossom as our sponsor.  There are so many adorable images over there I just can't even tell you....go check it out for yourself!  Christine is the artist and she has a style all her own that I love.
Before I show my finished card for this week, I have to show you what happens when a person inexperienced at using ProMarkers has a very juicy, brand new marker and looks up to answer a quick question.
See where that arrow is pointing?  Yeah, that wasn't what I meant to do!  I seriously just looked up for a second and when I looked back down I almost had a cow.  It takes me so long to get faces and hair done and I was actually pretty happy with this one.  Starting over wasn't an option.  Time for some quick thinking.

I have to say that I'm really lovin' my "recovery on ink-gate" as Kate called it in our JIC Team B Facebook page.  (How funny is that?)  Here's my card for the Bingo challenge:
I decided to use the row that contains:
Squares, 3 papers, and flowers

This adorable Penny Blossom image is called "Hang in there."  After I started fussy cutting to eliminate the spot where the purple marker threw up, I noticed she looked like she was leaning out a window so I just went with it.

The bunting is cut from paper in the Paper House Romance 6x6 pad.  (Thanks again, Troy!)  I got the rustic twine on Etsy at the Glitter and Kitsch shop.  The teeny, tiny clothes pins were ordered off of Amazon ages ago.  I didn't realize just how teeny, tiny they were.  They were too small for my original purpose but I knew that someday they would be perfect for something.  That someday arrived when I needed to salvage this image.  Here's a pic of the side of the card to show the clothes pins a bit better:

The brick design paper as well as the very light pink behind that are from packs of Studio G paper that I got in the Michaels Dollar Bin!  I wish my photo showed the design on the pink paper; it's so subtle and sweet.  The flowers are from Wild Orchid Crafts.

Even with the ink accident and the need to re-think my design for this card, I had so much fun doing it.  Penny Blossom's super cute image is definitely responsible for that!  You really should go check out Christine's store....she's incredibly talented.

All of us at Just Inspirational Challenges are looking forward to seeing how you decide to play Bingo this week.  Have some fun with it and good luck!!


I would like to include this card in the following challenges:


Related Posts Plugin for WordPress, Blogger...